 By Rakesh Joshi
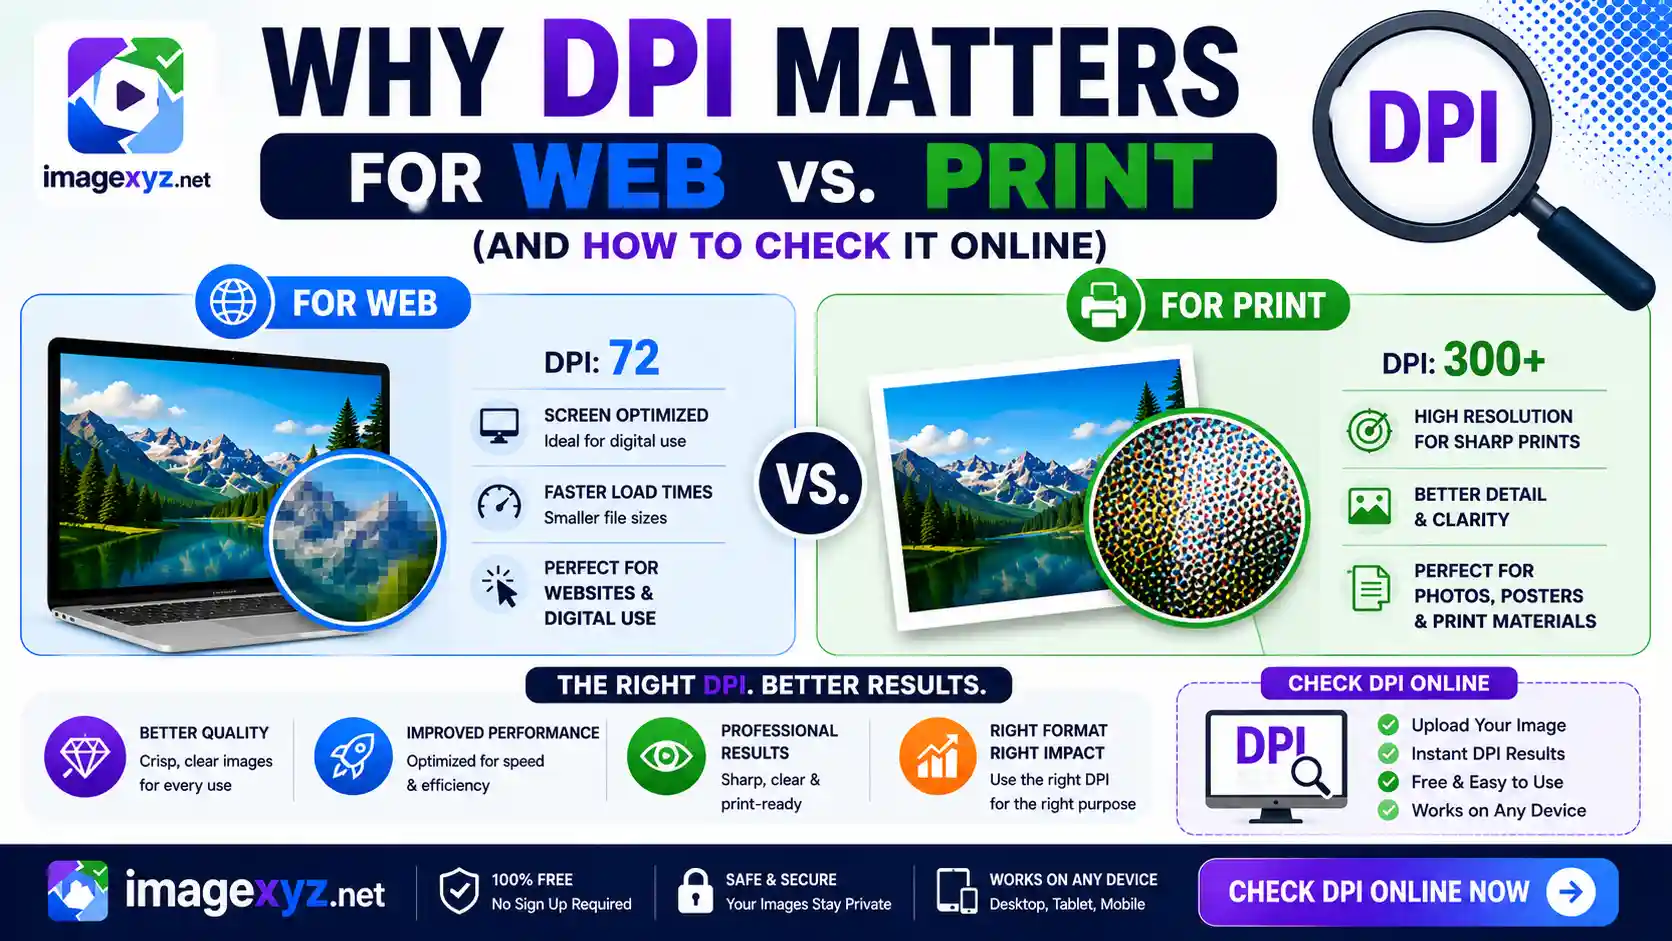
In the digital age, image resolution is one of the most frequently misunderstood topics among web developers, graphic designers, and photographers. You have likely heard arguments about whether 72 DPI is mandatory for the web, or why print shops refuse to accept any file below 300 DPI. To clear up this confusion, it is essential to understand Why DPI Matters for Web vs. Print (And How to Check It Online). Using the wrong settings can lead to blurry, pixelated brochures, or bloat your web pages with heavy files that slow down loading times and damage your Google rankings. This guide provides a detailed technical analysis of DPI (Dots Per Inch) and PPI (Pixels Per Inch), showing how screens and printers process resolutions differently and how you can check and modify image metadata locally and securely.
When optimizing image resolutions, using standard cloud converters poses a severe privacy risk: uploading personal photos or official document scans to remote servers exposes your sensitive metadata. Operating entirely inside your browser sandbox, ImageXyz processes your images locally without server uploads. Whether you are inspecting image headers using our Image DPI Checker, increasing values using Increase Image DPI, or converting header profiles using Convert DPI, you can ensure full control, speed, and privacy.
Inspect and Adjust Image Resolution Safely
Do you need to verify if your photo meets the 300 DPI threshold for official uploads or high-quality printing? Avoid unsafe cloud converters. Check and change your image DPI metadata instantly and locally using our client-side Image DPI Checker.
DPI vs. PPI: Understanding the Technical Differences
The core of the resolution confusion lies in the overlap between two separate systems of measurement: Dots Per Inch (DPI) and Pixels Per Inch (PPI). Although many layout programs and operating systems use the terms interchangeably, they refer to different mediums.
1. PPI (Pixels Per Inch): The Digital Display Unit
PPI measures the density of pixels on a digital screen. Every screen is made up of a grid of tiny light-emitting elements (subpixels) that combine to form pixels.
When you view an image on a screen, the display reads the image's physical pixel dimensions (for example, 1920 pixels wide by 1080 pixels high) and maps them directly to the screen's pixel grid. The screen's physical density (PPI) is fixed by the manufacturer. For example, a standard 24-inch monitor might have a density of 96 PPI, while a high-density 13-inch Retina display can reach 227 PPI. You cannot change a screen's hardware PPI by saving your image file differently.
Furthermore, modern screen panels use different subpixel layouts (like RGB stripe on IPS displays or PenTile layout on AMOLED screens). These hardware matrices arrange red, green, and blue light emitters to form what the operating system renders as a single logical pixel. As a result, screen PPI is a fixed physical property of your device display, and digital images conform to this hardware layout based on their total pixel width and height, completely ignoring file metadata headers.
2. DPI (Dots Per Inch): The Physical Print Unit
DPI refers to the resolution of a physical printing machine. Unlike screens, which display continuous light from a pixel grid, printers create images by depositing tiny dots of colored inks (typically Cyan, Magenta, Yellow, and Black) onto paper.
To create smooth gradients and clear details, a printer must group multiple ink dots together to represent a single pixel of an image. Therefore, the printer's physical dot density (DPI) must be much higher than the digital pixel density (PPI) of the file. A high-quality print target of 300 PPI requires a physical printer capable of outputting at 1200 or 2400 DPI to render color values accurately.
Printers use halftoning and dithering algorithms to mix microscopic ink droplets on paper, tricking the human eye into seeing continuous-tone gradients. This means a printer might use a cluster of 16 or 64 ink dots to render the color and value of a single image pixel. Consequently, while a web graphics file might have 300 pixels per inch, the physical printer must work at 1200 or 2400 dots per inch (DPI) to draw those pixels cleanly on paper without visible dots.
| Feature | PPI (Pixels Per Inch) | DPI (Dots Per Inch) |
|---|---|---|
| Medium | Digital Displays (Monitors, Phones, TVs) | Physical Output (Laser, Inkjet, Offset Printers) |
| Source Element | Light-emitting subpixels on a hardware grid | Physical ink droplets deposited on paper |
| Control Method | Managed by image pixel width and height | Defined by printer settings and paper path specs |
| Standard Target | Varies (72 to 450+ depending on device) | 300 DPI for high-end print, 150 DPI for drafts |
Why DPI is Irrelevant for Web & Digital Displays
One of the most persistent myths in graphic design is that you must save web assets at "72 DPI" to optimize loading speeds. This idea stems from legacy Macintosh monitors in the 1980s, which had a physical density of exactly 72 pixels per inch.
Today, digital displays ignore the DPI metadata inside your image file. A browser displays images based entirely on physical pixel dimensions.
Consider an image that is 1200x800 pixels. If you display this image on a web page:
- If the image metadata is set to 72 DPI, it renders as 1200x800 pixels.
- If the image metadata is set to 300 DPI, it still renders as 1200x800 pixels.
On modern high-resolution screens (like Retina or HiDPI displays), browsers use a multiplier called Device Pixel Ratio (DPR). A CSS pixel is no longer equal to a single hardware pixel. For example, on a device with a DPR of 2.0, a 1200x800 CSS container will display a 2400x1600 physical pixel image to ensure visual clarity. In this scenario, the browser calculates the display dimensions using CSS pixel measurements and responsive layout variables, ignoring any DPI parameters inside the EXIF metadata segments.
Why DPI is Critical for Print Production
When you transition from screens to physical paper, DPI determines the quality of the output. Printers need a set density of pixels to create a sharp image. If the density is too low, the human eye will notice the individual blocks of color, resulting in pixelation.
To convert digital pixels into physical dimensions, use the standard formula:
Pixel Dimension / DPI = Print Dimension in Inches
Let's look at how a 3000x2000 pixel image prints at different resolutions:
- At 300 DPI: 3000 / 300 = 10 inches wide. The output is a crisp, photo-quality 10x6.6 inch print.
- At 150 DPI: 3000 / 150 = 20 inches wide. The image is twice as large (20x13.3 inches) but looks softer because the pixel density is halved.
- At 72 DPI: 3000 / 72 = 41.6 inches wide. The image is large (41.6x27.7 inches) but will look heavily pixelated and blurry from close up.
Real-World Print Media Benchmarks & Recommendations
Depending on what you are printing and how far away the viewer will be, the recommended resolution requirements change. For instance, a billboard seen from a block away does not need 300 DPI because the human eye cannot resolve fine details at that distance. Let's outline the industry standard output resolutions:
| Print Product | Standard DPI Target | Typical Viewing Distance | Quality Classification |
|---|---|---|---|
| Fine Art / Photobooks | 300 - 600 DPI | 6 - 12 inches | Ultra-High Definition (Museum Quality) |
| Magazines / Brochures | 300 DPI | 1 - 2 feet | Standard High Definition (Commercial Quality) |
| Newspapers / Newsprints | 150 - 200 DPI | 1.5 - 3 feet | Medium Definition (Draft Quality) |
| Posters / Exhibition Banners | 100 - 150 DPI | 3 - 6 feet | Medium Definition (Large Format) |
| Billboards / Large Signage | 15 - 72 DPI | 10 - 100+ feet | Low Density (Distance Optimized) |
Resampling vs. Resizing: What Happens When You Change DPI?
When you change an image's DPI, you must distinguish between two distinct methods: resizing (updating metadata headers) and resampling (modifying the actual pixel data).
- Resizing (Metadata Only): This method only alters the DPI numbers written inside the EXIF or JFIF headers, leaving the actual pixel dimensions untouched. If you change an image from 72 DPI to 300 DPI using this method, the image remains exactly 1200x800 pixels. No new pixels are generated, and no data is lost. This is the correct method when you have a high-resolution photo that is incorrectly labeled, or when you are preparing a document photo for official submission portals.
- Resampling (Modifying Pixels): This method changes the number of pixels in the image to maintain a specific print size at a new DPI. If you resample an image to increase the DPI, your editing software must insert new pixels using mathematical interpolation algorithms (such as Bilinear, Bicubic, or Lanczos interpolation). Since these algorithms only estimate the colors of the new pixels, upscaling a low-resolution image to 300 DPI will not make it look sharper; it will simply create a larger, blurry file.
To avoid degrading image quality, you should always aim to capture photos at the highest native resolution possible. If you only need to satisfy an online upload portal that checks for a 300 DPI flag, you should use metadata resizing tools like our Increase Image DPI tool to rewrite the header tags without resampling the image.
Where DPI is Stored: EXIF and JFIF Metadata Headers
If DPI doesn't affect pixels, where is it saved? DPI is stored as metadata tags inside the image file header.
- JPEG Files: DPI values are saved inside the JFIF (JPEG File Interchange Format) segment or the EXIF (Exchangeable Image File Format) buffer. The tags are designated as
XResolutionandYResolution, alongside aResolutionUnittag (which specifies inches or centimeters). - PNG Files: PNGs do not natively support EXIF metadata tags. Instead, they store resolution density in the
pHYs(physical pixel dimensions) chunk. This chunk defines the number of pixels per meter, which software like Adobe Photoshop reads and converts to DPI.
Step-by-Step Checklist to Verify and Convert DPI Locally
If you need to verify or change your image DPI for official applications (like passports, visas, or recruitment portal submissions), follow these steps to manage your metadata securely:
Determine the Required Target
Check the guidelines for your application portal. Most government recruitment systems (like UPSC, SSC, or state exams) require passport photos and signature files to be set to exactly 200 DPI or 300 DPI.
Verify Current DPI Metadata
Load your image file into our client-side Image DPI Checker. The tool parses the file header locally in browser memory and displays the current DPI. If no tags are found, it will calculate a fallback estimate based on standard web display defaults.
Change DPI without Altering Pixels
If your image has enough pixels but lacks the correct DPI metadata, open our Increase Image DPI tool. Enter your target resolution (e.g. 300), import the file, and download the updated version. The tool writes the new resolution tags into the EXIF header without re-compressing the image, preserving pixel quality.
Save and Export in Safe Formats
Download the updated image. Because ImageXyz runs entirely in your local browser sandbox, your files are never sent over the internet, ensuring your personal photos and data remain completely secure.