 By Rakesh Joshi
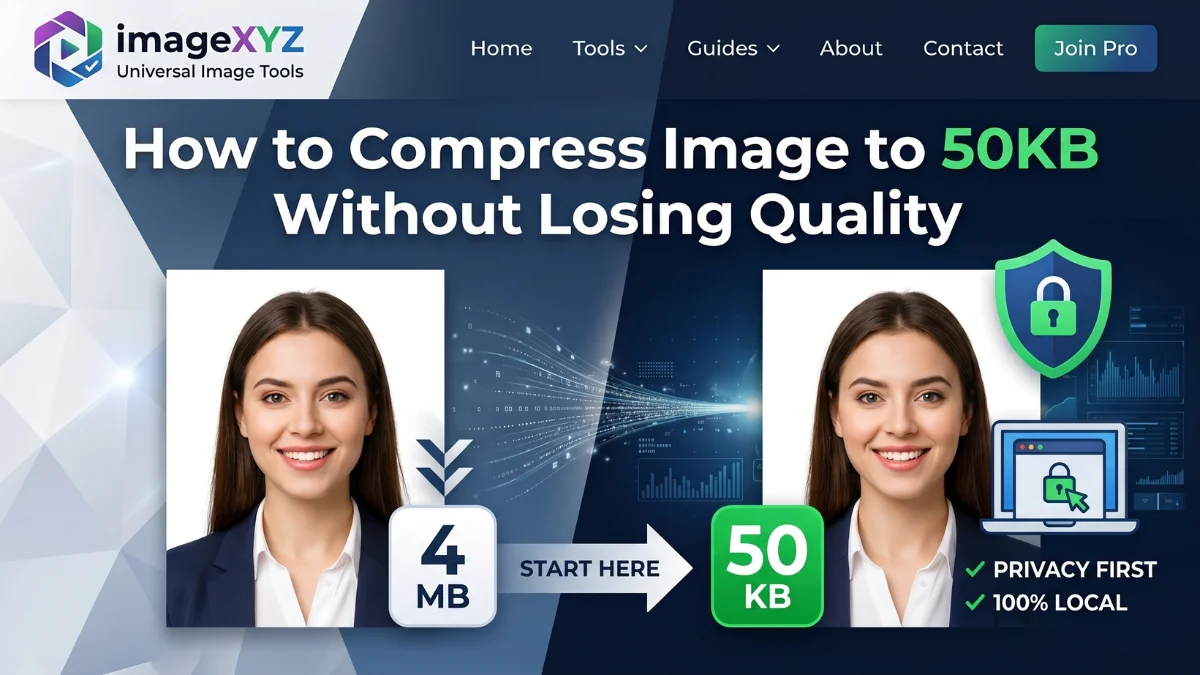
If you're uploading a passport photo, submitting an online government form, or trying to speed up a webpage, you've likely hit that annoying wall: the strict 50KB file size limit. Standard image compression tools often turn your crisp, clear photos into a pixelated mess. In this comprehensive, step-by-step guide, we will show you exactly how to compress image to 50KB without losing quality using secure, local browser utilities.
Most internet users assume that shrinking an image's storage footprint requires downloading complex software or surrendering privacy to questionable remote web applications. However, by understanding how digital image encoding works, you can easily compress JPEGs, PNGs, and WebPs using the free, client-side tools at ImageXyz's 50KB Image Compressor. Because our algorithms execute locally in your browser sandbox, your photographs never leave your computer.
Quick Tool Access
If you are in a rush and need to compress your file immediately to 50KB or less, jump straight to our dedicated 50KB Image Compressor Tool. It is calibrated with optimized presets specifically for student registrations and visa applications.
The Core Challenge: Why 50KB is a Technical Tightrope
In digital terms, 50KB represents exactly 51,200 bytes of data. While this limit sounds tiny, it is the standard cap for dozens of Indian recruitment boards (SSC, UPSC), educational portals (NEET, JEE), and banking gateways (IBPS). These agencies set tight limits to prevent their servers from collapsing under millions of megabyte-heavy photo uploads, ensuring that applicant portals load fast on mobile devices even over slow cellular networks.
When you attempt to squash a 4MB smartphone snapshot down to 50KB, you are trying to discard roughly 98.7% of its raw data. If your compression utility relies on naive linear scaling, it will introduce several ugly artifacts:
- Pixelation: Jagged, staircase-like edges along straight lines.
- Color Banding: Visible bands or gradients instead of smooth shading.
- Chroma Noise: Green and magenta blotches appearing around high-contrast areas.
- Blurring: Loss of facial lines, text readability, or signature patterns.
Understanding Image Formats and How They Behave Under Compression
Not all image formats are created equal. The file extension you choose drastically affects how much quality is lost when aiming for the 50KB limit.
1. JPEG/JPG: The Standard for Real-world Portraits
JPEG (Joint Photographic Experts Group) is a lossy format designed specifically for photographs. It works by converting RGB values to YCbCr (Luminance and Chrominance) and discarding high-frequency detail that the human eye is less sensitive to. At 50KB, a JPEG is usually the most compatible choice. However, if your starting JPEG is 4000x3000 pixels, compressing it to 50KB directly will require a quality setting below 10%, causing catastrophic blockiness. The secret is to downscale the pixel dimensions (e.g., to 600x600 pixels) before applying compression, keeping the quality setting around 70-80%.
2. PNG: The Choice for Graphics and Text
PNG (Portable Network Graphics) is a lossless format. While it is excellent for keeping text or signatures razor-sharp, it is incredibly inefficient for complex photos. If you attempt to compress a full-color photograph to 50KB in PNG format, you will fail because PNG does not support lossy scaling. To compress PNGs effectively to 50KB, you must reduce the color depth using color indexing (e.g. converting 24-bit PNG to 8-bit PNG, limiting the color palette to 256 colors or less). This works beautifully for signatures or simple icons, but will cause color banding on portraits.
3. WebP: The Modern Efficiency King
Developed by Google, WebP supports both lossy and lossless algorithms and is roughly 30% more efficient than JPEG at identical structural index quality. A photo compressed to WebP at 50KB will look noticeably sharper and cleaner than a JPEG of the same size. If the portal you are uploading to supports WebP, always choose it. If the portal strictly demands JPEG, you can compress using WebP first and then translate, though direct JPEG optimization is usually safer for official forms.
The Hidden Weight: Stripping EXIF Metadata
Did you know that when you take a photo with your phone, the file stores much more than just pixels? It embed a hidden block of data called EXIF (Exchangeable Image File Format) metadata. This contains:
- Your device model (e.g., Apple iPhone 15 Pro)
- Exact GPS coordinates of where the photo was taken
- Camera shutter speed, aperture, and ISO configurations
- A secondary, smaller thumbnail image used for quick previewing
By using our 50KB Compressor, this metadata is automatically discarded. Removing metadata instantly cleanses up to 80% of the non-image data, leaving the entire 50KB budget available for your pixels. This ensures maximum visual clarity.
The Golden Steps: How to Compress Image to 50KB Without Losing Quality
Here is the proven, manual-professional workflow to prepare your documents. This sequence yields the highest possible visual clarity:
Crop Out Unnecessary Margins
Before launching any compression, crop your image. For passport photos, crop tightly from mid-chest upward, leaving minimal background. For signatures, crop right up to the ink lines. By discarding the surrounding background waste, you reduce the area that requires compression, allowing the encoder to focus all 50KB of data on your face or name.
Resize the Pixel Dimensions First
Do not compress a 4000px wide image down to 50KB. Go to our Master Image Resizer or downscale the resolution inside our compressor. Aim for a sensible width: 600px to 800px is more than enough for a passport photo, and 300px is ideal for signatures. Resizing the pixel width decreases the raw byte density, making it easy to hit 50KB with virtually zero compression noise.
Set Target to 50KB in the Compressor
Upload your file to the 50KB Image Compressor Tool. Slide the size threshold to exactly 50KB. The underlying Javascript calculates the quantization tables dynamically. It runs several trial passes in micro-seconds to locate the absolute highest quality percentage that stays under 50KB.
Verify and Download Locally
Compare the input and output previews on our screen. Look closely at text lines or the edges of your signature. Once satisfied, click download. The file is saved directly from your browser's local memory to your system.
Watch Out for Blurry Text!
When compressing signatures, ensure the threshold does not wash out thin pen strokes. If the signature looks broken, go back to Step 2 and downscale the dimensions to 200px width, then re-compress at 95% quality. This keeps the signature lines solid and clean.
Common Portal Errors & Diagnostics
When uploading files to official portals, you may encounter strict validation errors. Here is how to diagnose and resolve them instantly using ImageXyz tools:
1. Error: "Invalid Aspect Ratio" or "Dimension Mismatch"
This occurs when the portal expects a specific shape (like a 3.5 x 4.5 cm passport ratio) but your uploaded file is square or landscape. For example, Staff Selection Commission (SSC) portals demand a 3.5:4.5 proportion. If you upload a square 1:1 image, it is blocked. To solve this, scan or crop your image directly using our preset templates:
- For SSC: Use the SSC Photo Resizer which enforces the correct 3.5 x 4.5 cm aspect ratio automatically.
- For general square ratios: Use our Square Cropper.
2. Error: "Signature Contrast Too Low" or "Illegible Document"
Portal OCR scanners process signatures in black and white. If your signature has a gray background due to a shadow from your phone, the scanner cannot segment the letters. To resolve this, run your cropped signature through our Black & White Converter. This strips away background gray shadows, producing a pure white canvas with high-contrast dark ink strokes.
3. Error: "File size must be greater than 10KB"
Sometimes you compress your image so successfully that the file size drops to 5KB or 8KB. If the portal requires a range of 20KB-50KB, it will block files that are too small. If you face this issue, use our KB Increaser Tool or adjust the compression quality slider to 90% or higher. This adds subtle padding and details to safely land your file size in the middle of the portal's target bracket.
4. Error: "Metadata header check failed"
Some security-conscious banking or recruitment websites block images containing hidden GPS tags or binary headers to prevent server exploits. Stripping metadata completely from the file resolves this. When you compile your JPEG inside ImageXyz, our script strips out all secondary headers automatically, outputting a clean pixel stream that passes all security checks.
Pre-Upload Optimization Checklist
Before submitting your document on any portal, check off these critical items to guarantee approval on the first try:
- Background Neutrality: Ensure the portrait features a solid white or very light blue background. Complex patterns or curtains will lead to instant rejection.
- No Accessories: Do not wear sunglasses, hats, caps, or large head coverings. Eyes must be fully visible and centered.
- Buffer File Size: Do not aim for exactly 50.0KB. Some servers calculate kilobytes differently (using 1000 bytes per KB instead of 1024), which makes a 49.9KB file read as 51KB. Aim for a safe buffer between 40KB and 45KB.
- File Extension Check: Ensure your file ends in a lowercase
.jpgor.jpeg. Certain older servers will reject files with uppercase.JPGextensions. If needed, rename the extension before upload.
Official Registration Portals Specification Sheet
Below is a quick reference table of popular exam and application portals that strictly enforce the 50KB limit or similar limits:
| Exam / Portal | File Target Size | Dimension Guidelines | Recommended Tool Link |
|---|---|---|---|
| SSC (Staff Selection Commission) | 20 KB to 50 KB | 3.5 x 4.5 cm (200 x 230 pixels) | SSC Photo Resizer |
| TNPSC Group Exams | 20 KB to 50 KB | 125 x 165 pixels (Luminance balanced) | TNPSC Photo Compressor |
| UPSC CSE / CDS | 20 KB to 300 KB | 350 x 350 pixels (Min threshold) | UPSC Image Resizer |
| NEET UG / PG | 10 KB to 200 KB | 3.5 x 4.5 cm (White background) | NEET Photo Resizer |
| PAN Card Application | Max 50 KB | 2.5 x 3.5 cm (300 DPI required) | NSDL PAN Card Photo & Signature Resizer |
Alternative Desktop & Offline Compression Methods
If you do not have internet access or want to explore offline tools, several desktop options are available to compress your image to 50KB:
1. Adobe Photoshop (Save for Web)
Open your image in Photoshop, press Ctrl + Shift + Alt + S (or File > Export > Save for Web Legacy). Choose JPEG, toggle the dropdown to "Optimized," and look at the bottom-left corner to monitor the estimated file size. Drag the Quality slider until the output reads roughly 48KB. This legacy module uses excellent downsampling logic to maintain crisp detail.
2. MS Paint (Windows Built-in)
Open your file in Paint, click on "Resize" in the Home tab. Toggle the selection to "Percentage" or "Pixels," and reduce the horizontal and vertical inputs (e.g. to 50% or 30%). Save the file as a JPEG. Check its file properties to verify size. While Paint lacks precision controls, scaling down the dimensions is a reliable, free offline method to drop below 50KB.
3. Command Line (ImageMagick)
For developers or terminal enthusiasts, ImageMagick is the ultimate tool. Install it and run the following command in your terminal:
magick input.jpg -resize 800x800 -strip -define jpeg:extent=50kb output.jpg
This command resizes the file, strips all EXIF metadata, and uses binary search algorithms to output a JPEG that is exactly 50KB or slightly below, maximizing quality.